english-for-designers
IMAGE TO TEXT
For this exercise please form groups of 2-3 people. Each group has a simple task - describe a diagram. When finished, exchange your instructions and draw a diagram based on the instructions that were given to you. Examples of diagrams and instructions are enclosed below.
How to draw diagram #1
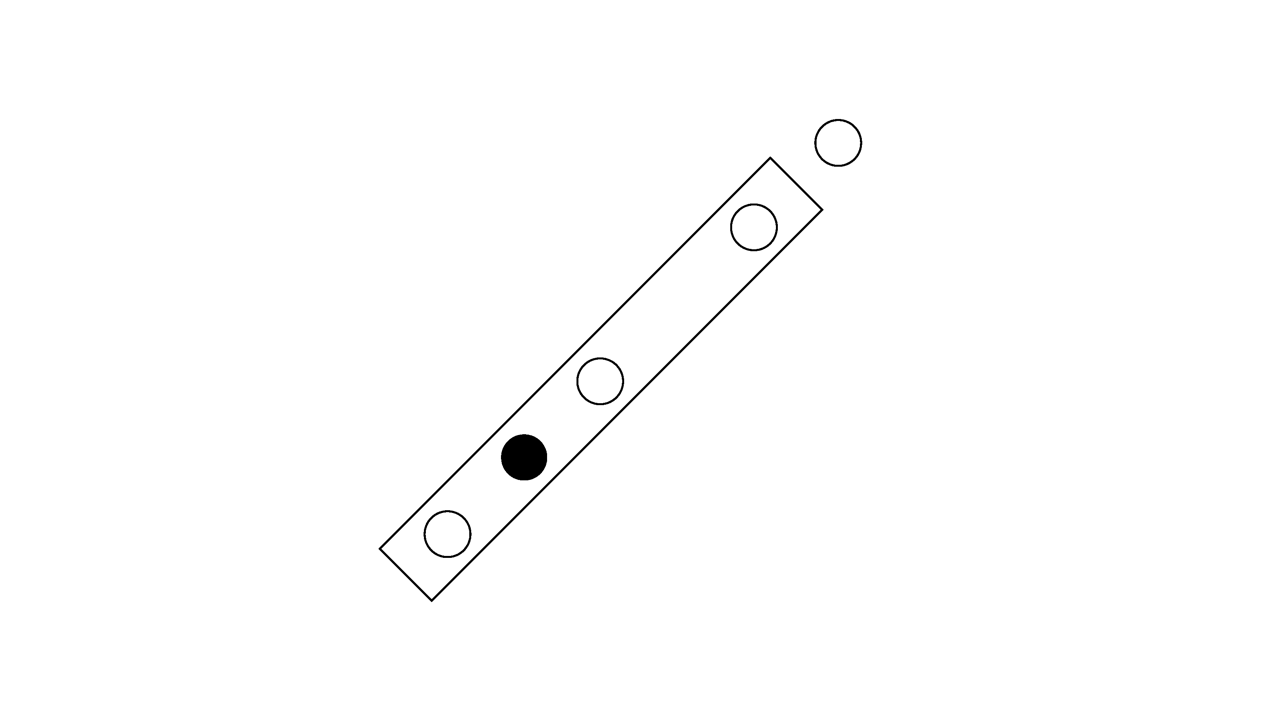
- Draw a diagonal rectangle in the middle of your paper. Start from the bottom left corner to the top right corner of your page. Keep in mind that this rectangle is about 2 cm wide and 13 cm long.
- Draw three circles inside the rectangle, positioned on the left side. Each circle is 2 cm apart. The middle circle is filled, while the other two remain blank.
- Draw one circle inside the rectangle, positioned on the right side. (1 cm from the right end) This circle is blank.
- Draw one circle outside the rectangle, positioned on the right. (1cm from the left end) Leave this circle blank as well.
When you’re done, it should resemble a flute.
Note: All circles are aligned in one diagonal line. (Don’t draw the line, though. Just imagine it!)
Result
How to draw diagram #2
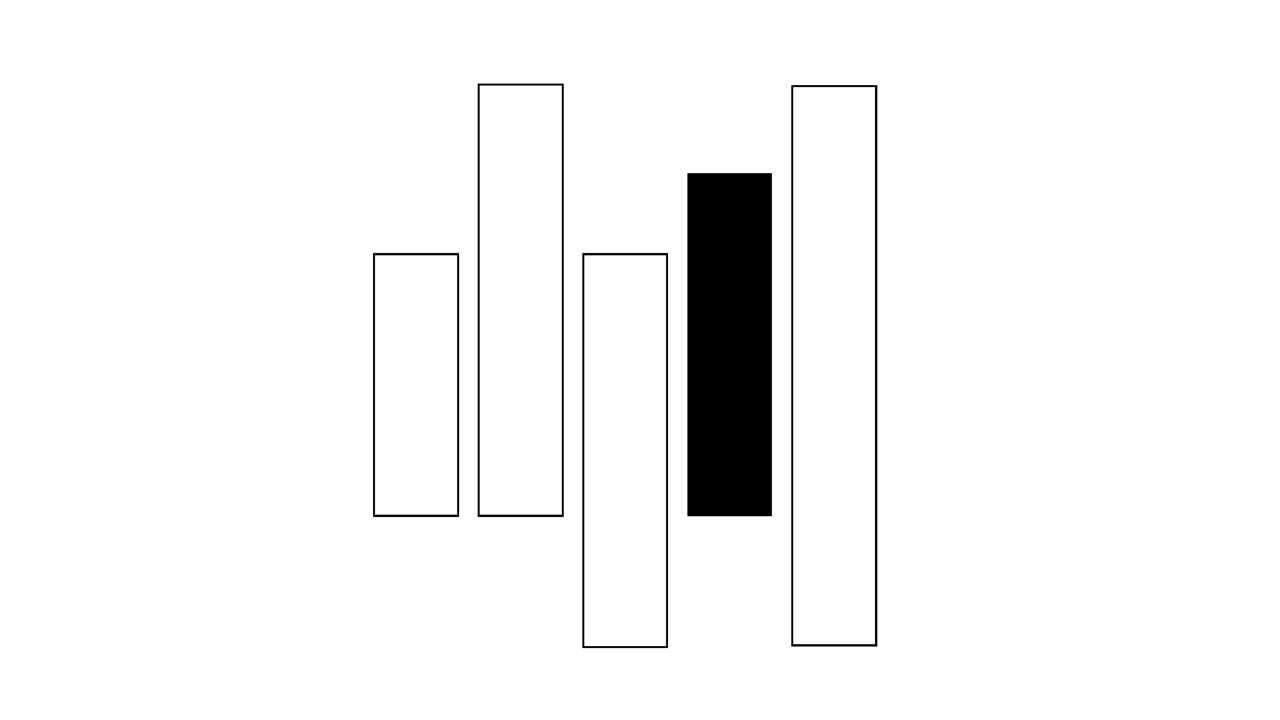
You are going to draw five rectangles next to each other in the middle of the paper. The width of each rectangle is the same, which is about 1,5 cm. The height of the rectangles is different. They are evenly spaced out, about 0,5 cm apart. Start drawing from the left side of your paper and continue adding rectangles to the right.
- The first rectangle is the shorter one and is about 4 cm long.
- The second one is taller, about 7cm long. The bottom sides of the first and second rectangle are aligned.
- The third one is the same size as the second one. The top of the rectangle, however, is aligned with the top side of the first rectangle. This results in the third rectangle going lower than our existing rectangles.
- The bottom side of the fourth rectangle is aligned with the bottom side of the first rectangle. This rectangle is about 6 cm long.
- The fifth one is the tallest. Its top side is aligned with the top side of the second rectangle. On top of that, its bottom side is aligned with the bottom side of the third rectangle.
Note: All rectangles are blank, while the fourth rectangle is filled out.
Result
How to draw diagram #3
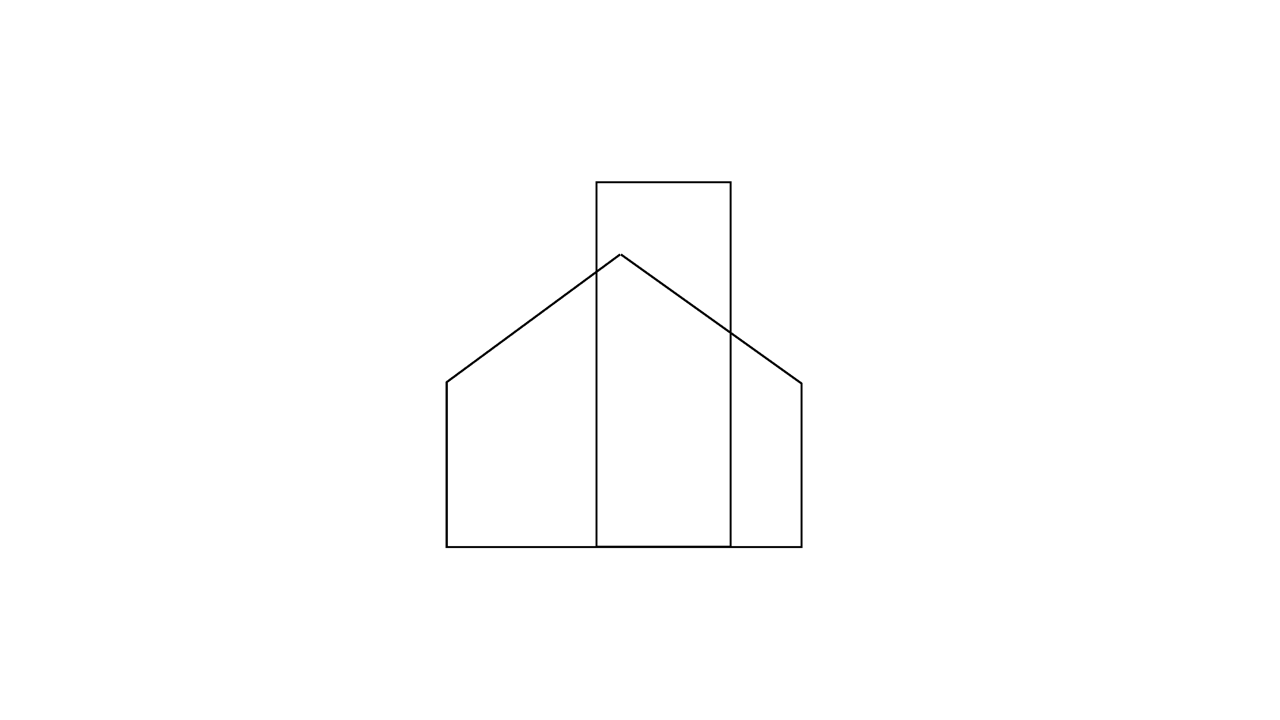
- In the picture, we can see two objects. The first object is the shape of a wide house. Its bottom side is about 8 cm wide and the sides of the house are about 4 cm long. Each side of the roof is about 5 cm long.
- The second object is a vertically oriented rectangle, resembling an extremely wide chimney. The top side of the rectangle starts about 2 cm above the top of the roof. It goes all the way down to the base of the house. This way, the bottom side of the rectangle and the bottom side of the house become one line. The next crucial part is its location. Keep in mind, the rectangle is inside of the house-shaped object. The right side of the chimney should be about 2 cm next to the right side of the house. The width of the chimney is about 3 cm. If done correctly, the rectangle overlaps a majority of the right side of the house and slightly overlaps the middle part of the rooftop to the left.
Result
 `
`